Uploading Documents
This guide explains how to add files to your library and choose the right extraction method for your needs.
Last updated 4 months ago
Uploading your lecture slides, scripts, and notes is the fuel that powers acemate. Once your documents are in the system, our AI can turn them into podcasts, exams, flashcards, and personalized tutoring sessions.
1. Supported File Types & Limits
Acemate supports the most common academic formats. Before uploading, ensure your files meet the following criteria:
PDF (.pdf): Best for lecture slides, academic papers, and scanned scripts.
Word (.docx): Ideal for typed notes and essays.
PowerPoint (.pptx): Perfect for presentation slides.
File Size Limits:
Free Plan: Up to 20 MB per file.
Pro Plan: Up to 80 MB per file.
2. How to Upload Documents
Step 1: Open the Upload Dialog
There are two ways to start an upload:
From the Library: Go to Library in your course sidebar, click the + Add button, and select Upload File.
From Quick Actions: Use the "Quick Actions" menu on your Home or Workspace dashboard.
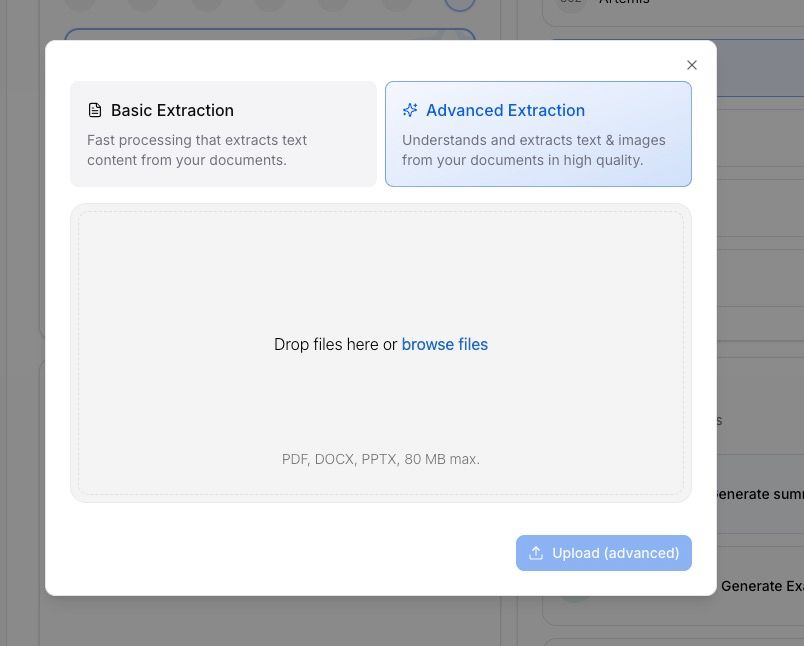
File upload dialog
Step 2: Choose Your Extraction Method
Before selecting files, choose how Acemate should read them. This is crucial for getting the best quality results.
Step 3: Select & Upload
Drag and drop your files directly into the upload area, or click browse files to select them from your computer.
You can select multiple files at once.
Review your selection and click Upload.
3. Understanding Processing Status
Once you hit upload, Acemate begins analyzing your content immediately. You can track the progress in your Library:
Loading / Processing: The AI is currently reading and indexing your content.
Basic Extraction: Usually takes 1–2 minutes.
Advanced Extraction: May take 2–4 minutes (due to deeper visual analysis).
Done / Ready: The document is fully processed. You can now use it to generate quizzes, summaries, or chat with the AI Tutor.
Failed / Error: The upload was interrupted. Check your internet connection or file format and try again.
4. Troubleshooting: What if an Upload Fails?
Sometimes an upload might get stuck or show a Failed status. This usually happens due to one of the following reasons:
Encryption: The PDF is password-protected or has restrictive security settings.
Corrupted File: The file itself is damaged or in an unsupported format.
Connection: Your internet connection dropped during the upload.
How to Fix It:
Delete: Locate the failed document in your Library list and delete it.
Check: Ensure your file is not password-protected and is a valid PDF, DOCX, or PPTX.
Retry: Upload the file again.
Support: If the issue persists after re-uploading, please reach out to our Support Team for assistance. We are happy to help investigate the specific file. [add link to support]
4. Free vs. Pro Extraction
Should you upgrade? Here is the breakdown of the extraction capabilities:
Pro Tip: If your lectures contain many charts, graphs, or chemical structures, we highly recommend Pro (Advanced Extraction). Without it, the AI cannot "see" the visual data in your slides, which may lead to missing context in your generated exams or podcasts.
5. Tips for Best Results
File Names Matter: Use clear, descriptive names like "Calculus_Lecture3.pdf" instead of "scan001.pdf". This helps the AI contextually understand the topic.
Quality Check: Avoid blurry scans or low-quality photos of notes. If you can't read it easily, the AI probably can't either.
Patience is Key: Wait for the status to change to Ready before trying to generate a Podcast or Exam. The AI needs to finish "reading" first!
6. What Happens Next?
Once your documents are uploaded:
They appear instantly in your Library.
The content becomes available for the AI Tutor to answer questions.
You can immediately generate Summaries, Exams, Podcasts, and Flashcards based on those specific files.